Step by Step Beginners Guide in Setting up a WordPress site
Many people believe that setting up a website requires a ton of technical knowledge or hiring someone and spending hundreds or even thousands of dollars to have a website created. Believe it or not, you can easily setup your very own website using WordPress in just a few minutes and with a minimal amount of tweaking, you can develop a professional looking site for very little expense.
Below are 7 Easy Steps on Setting up a WordPress Site
Setting Up Web Hosting and Domain Name
While there are many places where you can setup a domain name and hosting, Bluehost.com is a preferred choice based on their baby plan. Their baby plan allows you to host as many websites as you want for one flat monthly rate.
After you sign-up for hosting, you can enter a domain that you want to register and if it is available, you can register that domain for a flat fee. Once your domain name is registered, it remains your property for the next year and you can renew your domain name for as long as you wish to continue with your site.
You also might want to read – How to pick a memorable Domain Name for your website.
Installing WordPress
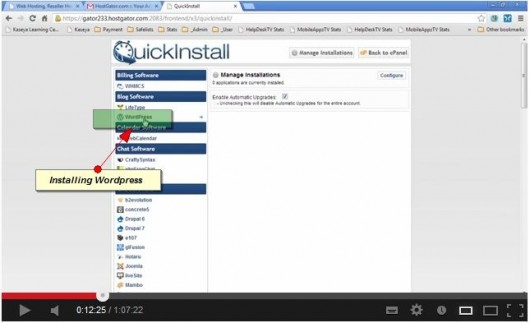
Hostgator and most hosting providers have a quick and easy setup for WordPress for any site hosted by their service. First, login to your cPanel for your website and then go to the software services section and click QuickInstall. On the left hand side you will have an option to select WordPress.
After selecting WordPress, you will be prompted for your domain name followed by your admin email address, blog title, as well as your admin username and your first and last name. After those fields are filled in, click install now. This will complete your install. You will want to wait two to four hours after installing for your site to work.
Installing Themes
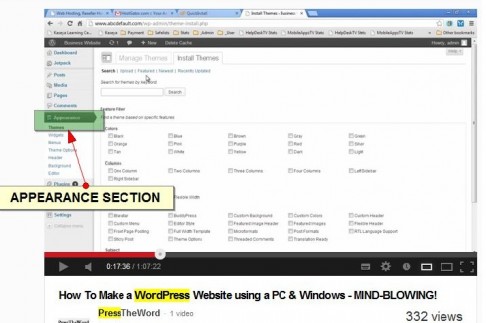
Once you install WordPress, you will want to login to your admin page (ex. www.yoursite.com/wp-admin) and then go to your WordPress dashboard. From here, you can change everything about your WordPress site but first we are going to install a new theme which is basically a template for your site.
In your dashboard, go to appearance and then themes. From here you will want to click on the install themes tab. You can either browse or search for a theme that meets your taste and once you find one to your liking, click the install now button for that theme and then click activate. If you head back to your main site, you will now see the theme you just installed.
Adding Pages
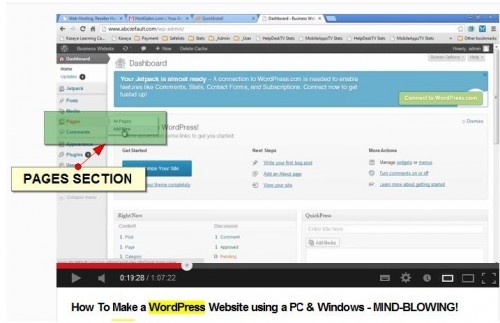
Adding pages in WordPress is simple. Go to your dashboard and then hover your mouse above pages, and then select add new. From there you will be taken to a Add New Page screen where you can enter the new page title, content, and attributes for the page.
Changing Homepage
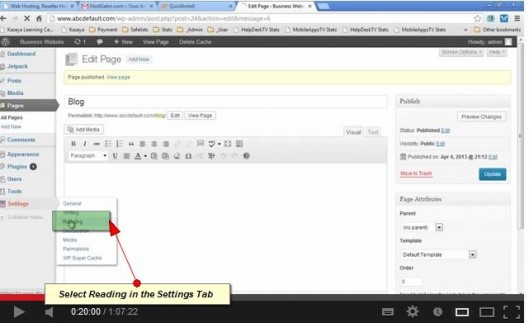
If you wanted to change the page that your blog loads to, all you need to do is go to your dashboard, hover your mouse above settings, and then select reading.
From here you can change the page that shows up as your front page. The default is the last post you made on WordPress but you can change this to a static page, such as home.
Using Widgets
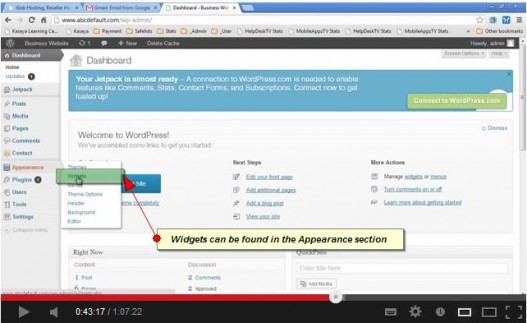
Widgets are various little items on your blog that increase user functionality and enhance the user experience. These range from calendars to comment boxes, search fields, and more. Go to your dashboard, highlight appearance and select widgets. From there you will be taken to a screen with your available widgets as well as boxes to drag them to.
These may be labeled main sidebar, footer area, etc. Expand the box you want to install the widget in and then drag the widget to that box. You will then be prompted to give a title to the widget and once doing so you will want to save the widget. Refresh your page and your widget should appear.
Adding Youtube and Facebook Functionality
If you want your blog readers to follow you on Facebook or even subscribe to your Youtube channel, you will need to add this functionality to your blog through widgets. We already went over how to add widgets so now you need to acquire your widgets for Youtube and Facebook.
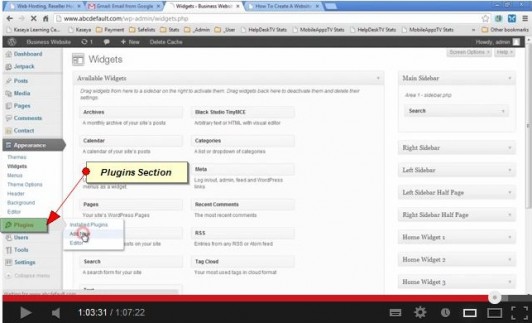
Youtube has a WordPress plugin and to access it, go to dashboard and then go to plugins. Search for the Youtube subscribe plugin and then select install. When you go back to your widgets section, you will now be able to add the Youtube widget to your sidebar or wherever you want on your blog.
The Facebook widget will require a couple more steps. First, go to Google and search for “Facebook like box widget” and you will be presented a link to the Facebook developers page for the widget. There you will enter your Facebook page, enter the size you want the widget and then click get code. When the code is presented, select the Iframe code to simplify matters. Copy the code and head over to the widget section of your dashboard. Drag a text box widget to your sidebar and paste the code and click save. You will then have the “Like Me on Facebook” widget displayed on your page.
Wrap it Up
So there you go, I hope that we were able to help you get your WordPress site up and running. If you are looking for additional info on starting a blog, the FirstSiteGuide.com’s team made an excellent step by step tutorial. If you want a visual step by step guide, feel free to watch our tutorial below:
