Inserting Images into your Guest Post
What better way to make your article better than having images in them? It’s not only good for your readers, it’s good for SEO as well. That is why our new online form now requires you to add at least 1 image to your post. Although, we can only do external images for now. Continue below to learn how to insert images into your post:
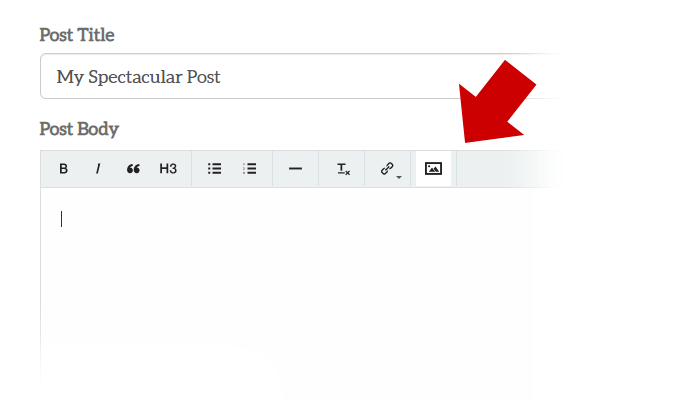
Click the image icon
You will see in our Post Body editor a button that looks like below. Go ahead click that.

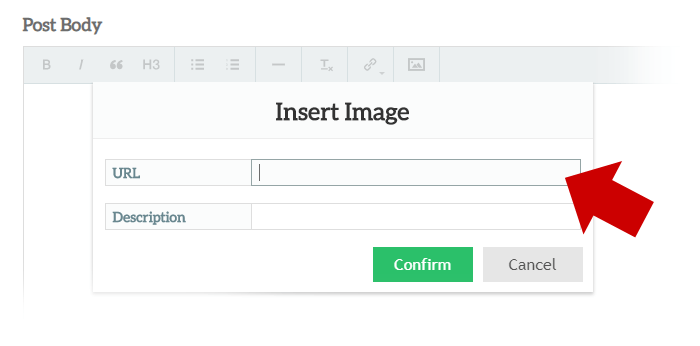
After clicking, a mini window will appear with two fields 1) URL and 2) Description. The URL field is where you’re going to enter the absolute url of the image you’re using.

In a new browser tab, let’s go to Unsplash to get an image. Unsplash is a great resource for royalty free photos. You can use images here without worrying about violating copyright rules.
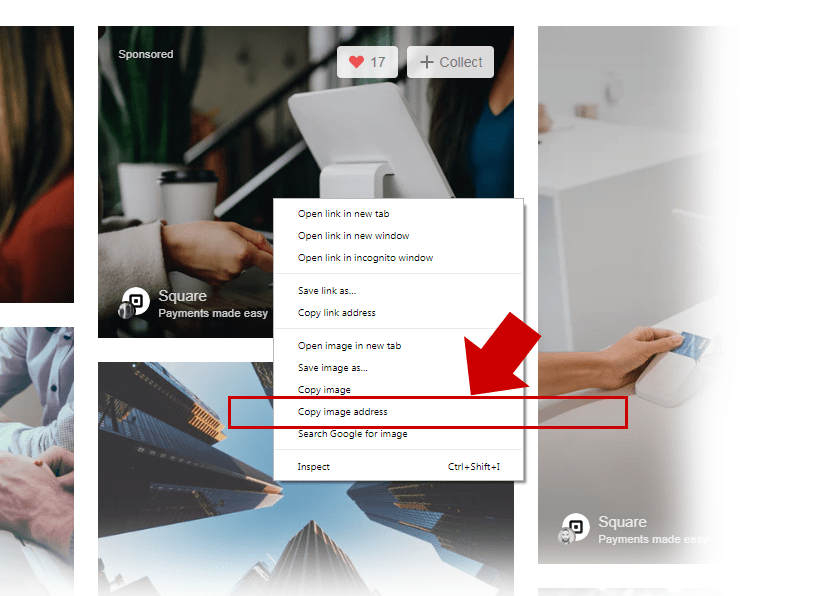
After searching for an image, right click on it and select “Copy image address”.

Now go back to the online form, and paste that value inside the URL field. Also don’t forget to add a “Description” – which is something to describe the image. This is also good for SEO.
Click “Confirm” to insert the image into your post.

The mini window will disappear when you click “Confirm“. Remember, the image will insert on where you put your cursor last.
And there you have it. You have just inserted an image into your post. Your readers will now enjoy your article better.
Click Here to Submit a Post.